Free Android Tricks

Saturday

Stock and Clockwork Mod Recovery

What is recovery? 
In Android, recovery refers to the dedicated, bootable partition that has the recovery console installed. A combination of key presses (Home+Volume Up+Power Button for SGY) will boot your phone to recovery, where you can find tools to help repair (recover) your installation as well as install official OS updates. Because Android is open and has the recovery source code available, building a customized version with more and different options is relatively easy as well. Let's look at both options.

The stock recovery is pretty limited, but that's by design. Its main purpose is to delete all user data and files, or to perform system updates. Normally, both these operations are started from the running Android system, or you can do things manually and boot right into recovery yourself. When you tell your phone to do a factory reset, recovery is what boots up and erases the files and data. Likewise with updates -- when we restart to install an official OS update, it's done in recovery. Recovery is also where we go to manually install official OS updates we've downloaded from the Internet. It's very useful, but limited.

Clockwork Mod or Custom Android recoveries offer much more. They have been coded to allow for backup and restore functions, selective deletion of data so you don't have to wipe everything, and modified to allow update packages that have not been digitally signed by official sources. You also can mount various partitions so that you can copy files to the SD card without having to remove it or reboot into Android. Anytime you see someone mentioning Clockwork or Amon Ra, they're talking about custom recoveries. Because of the extra functionality built in, they are a pretty important tool for folks who want to hack their Android phone or tablet. Recoveries aren't as pretty as a custom ROM and don't get the same love from users and bloggers that custom builds of Android do, but in the end they're even more important. Without them none of this custom ROM stuff would be possible. 
Read More

Friday


use android phone as webcamThese days most new laptops feature an integrated webcam, often with an impressive number of megapixels. Users with older, and desktop computers still have to rely on an external one.
But if you’re not in a long distance relationship, or regularly make conference calls for work, chances are you’ve never even bought one.
If you need to make a few Skype calls or want to start a Hangout on Google Plus, but don’t have the necessary equipment at hand, don’t run off to the hardware store just yet! If you have an Android smartphone with camera, you can simply use your phone instead. Given, the framerate will not be on par with a decent store-bought webcam, but it’s more than good enough for a sporadic video chat.

1. Prerequisites

The tool we’re going to use is called SmartCam. The application is twofold; to use it you’ll need to install both the Android client and the desktop client. This desktop client is available for Windows and Linux computers. In this article we’re going to focus on Windows, but the process is similar if you’re using Linux.
Make sure you’ve installed both applications before continuing to the next step.

2. Configuration

There are two ways to connect SmartCam to your computer; Wi-Fi and BlueTooth. We’ll show you how to connect over Wi-Fi.
First open SmartCam on your Android phone, press the menu button on your phone to show the available options, and select Settings. Here, select TCP/IP (WiFi) as your Connection type, and enter the local IP address of your computer under Remote server.
use android phone as webcam
You can find the local IP address of a Windows computer using Command Prompt. Open command prompt by searching for it in your Applications, or by running “cmd” in the Start menu.
In Command Prompt, enter “ipconfig /all” and press enter. There’ll be a lot of information here; a block of data for every (virtual) network adapter. If your computer also accesses the internet through Wi-Fi, look for the IPv4 address of your Wireless LAN adapter. If your computer uses a cable to connect to the internet, look for an ethernet adapter.
use android as webcam
Open SmartCam on your computer as well, and make sure the connection type in the preferences pane is also set to use TCP/IP (WiFi).

3. Connecting

Turn on the Wi-Fi connectivity on your Android, and connect your phone to the same network that your computer is on. With SmartCam already open on your computer, launch the application on your Android phone and select Menu -> Connect WiFi.
use android phone as webcam
In less than a minute, the image of your Android phone camera should appear in the SmartCam application on your desktop, with the video resolution and framerate visible below the video stream. If you’re so inclined, you can also record this input to a video file on your desktop. To use your makeshift webcam in another application, simply select SmartCam as your webcam when prompted.
How well does your smartphone webcam hold up? Test it out, and let us know in the comments below this article!
Read More

Thursday


Galaxy Y Duos GT-S6102 Fake ICS Updates 

Some In info About ICS Updates 

Check Some Image For Know More..

No Official Kernel Source Released , No Official Firmware Released And Check My OWN Device S6102DDMC1 Device Info Its GB 2.3.6 Not 4.0.1


Read More
TESTED and WORKING ODIN FLASHABLE Packages For Samsung Galaxy Y Duos


Disclaimer: I'm not responsible for any damage done to your phone.
Use the following materials at your own risk only!


====================>*.*<=====================

Bangladesh
PDA: S6102DDLJ1
CSC: S6102ODDLJ1
Version: 2.3.6
Date: 2012-10-26
DOWNLOAD


====================>*.*<=====================

Germany
Regions: Austria, Belgium, France, Germany, Hungary, Italy, Spain, United Kingdom
PDA: S6102XXLG3
CSC: S6102OXXLG4
Version: 2.3.6
Date: Unknown
DOWNLOAD


====================>*.*<=====================

Hong Kong
Regions: China, Hong Kong 
PDA: S6102ZSLH2
CSC: S6102OZSLH2
Version: 2.3.6
Date: 2012-08-20
DOWNLOAD


====================>*.*<=====================

Hungary
Regions: Austria, Belgium, France, Germany, Hungary, Italy, Spain, United Kingdom 
PDA: S6102XXLG3
CSC: S6102OXXLG4
Version: 2.3.6
Date: 2012-07-25
Now In Download List


====================>*.*<=====================

India
Regions: India 
PDA: S6102DDLJ1
CSC: S6102ODDLJ1
Version: 2.3.6
Date: 2012-10-26
DOWNLOAD


====================>*.*<=====================

Indonesia
Big Thanks To MNgez 
Regions: Indonesia, Malaysia, Philippines, Singapore, Vietnam 
PDA: S6102DXLK2
CSC: S6102OLBLK1
Version: 2.3.6
Date: 2012-11-22
DOWNLOAD


====================>*.*<=====================

Malaysia
Regions: Malaysia 
PDA: S6102DXLK2
CSC: S6102OLBLK1
Version: 2.3.6
Date: 2012-11-22
DOWNLOAD


====================>*.*<=====================

Nepal
Regions: Nepal 
PDA: S6102DDLJ1
CSC: S6102ODDLJ1
Version: 2.3.6
Date: 2012-10-26
DOWNLOAD


====================>*.*<=====================

Pakistan (PAK)
Regions: Arabic 
PDA: S6102JPLE2
CSC: S6102OJPLD3
Version: 2.3.6
Date: 2012-07-17
DOWNLOAD


====================>*.*<=====================

Iraq
Regions: Arabic 
PDA: S6102JPLC3
CSC: S6102OJPLB1
Version: 2.3.6
Date: 2012-03-21
DOWNLOAD


====================>*.*<=====================

Saudi Arabia (JED)
Regions: Arabic 
PDA: S6102JPLC3
CSC: S6102OJPLB1
Version: 2.3.6
Date: 2012-03-21
DOWNLOAD


====================>*.*<=====================

Philippines
Regions: Indonesia, Malaysia, Philippines, Singapore, Vietnam 
PDA: S6102DXLJ2
CSC: S6102OLBLJ1
Version: 2.3.6
Date: 2012-10-18
DOWNLOAD


====================>*.*<=====================

Vietnam
Regions: Vietnam 
PDA: S6102DXLK2
CSC: S6102OLBLK1
Version: 2.3.6
Date: 2012-11-22
DOWNLOAD


====================>*.*<=====================

Thailand
Regions: Thailand 
PDA: S6102DXLK2
CSC: S6102OLBLK1
Version: 2.3.6
Date: 2012-11-22
DOWNLOAD


====================>*.*<=====================

Sri Lanka
Regions: Sri Lanka 
PDA: S6102DDLJ1
CSC: S6102ODDLJ1
Version: 2.3.6
Date: 2012-10-26
DOWNLOAD


====================>*.*<=====================

Germany
Regions: Austria, Belgium, France, Germany, Hungary, Italy, Spain, United Kingdom 
PDA: S6102XXLH1
CSC: S6102DBTLH1
Version: 2.3.6
Date: 2012-09-07
DOWNLOAD
Galaxy-Updates Link


====================>*.*<=====================


_
Read More

Wednesday

Here are some quick tips :
(Here I'll use the terms like Download-Mode & Recovery-Mode, If you dont know what are they please click here. There "BOOT to RECOVERY" & "BOOT to BOOTLOADER" means how to enter into Recovery-Mode & Download-Mode respectively.)


A Bricked Phone May Have One or More (Below Problems) :

1. Booting to the ROM(Android) not possible.
2. Booting to the Recovery-Mode not possible.
3. Black screen or Bootloop(Repeated Restarting of Phone at Boot Animation or Samsung Galaxy Y Logo).


Possible Solutions :
(Remember there'll be data loss using these solutions so always try to keep a backup)

1. If you can still enter into Recovery-Mode 
(a). Try to clear Data & Cache then check.
(b). Try Installing a Custom ROM using CWM(ClockWorkMod Recovery) & check.
(For Custom ROM & CWM Visit here.)

2. If Recovery-Mode didn't helped Enter into Download-Mode & flash an odin supported stock rom(using ODIN 1.84 or 1.85) from Doky73's Thread(Flashing Guide in 2nd post).


*You can inform me, if anything left out.

Note :
1. I'll be not held responsible for anything that happens to your phone.
2. Before posting try to search for similar type problems out there & try the solution, if that doesn't solve your problem then post here.
Read More

Monday


Android 4.1 Jelly Bean ROM for Samsung Galaxy Y S5360 is now available to update. The Jelly Bean ROM for Galaxy Y is named as Jelly Blast. You can upgrade your phone to Android 4.1.1 Jelly Bean Operating System by installing this custom ROM. After installing the custom ROM, you can check your device’s version on about phone option under settings menu.
The Samsung Galaxy Y S5360 is normally comes with Android 2.3 Gingerbread as an Operating System. There is no official Android 4.0 Ice Cream Sandwich upgrade from Samsung mobile Support. Because the phone’s hardware configuration is not supported for the upgrade. But, you can install ICS by custom ROM. Check this – How to Install ICS on Samsung Galaxy Y.  The Phone is comes with 800 MHz processor, 3.2 Mega pixel camera, Capacitive touch Screen.
Samsung Galaxy Y jelly bean photos

Warning before installing Jelly Bean ROM on Samsung Galaxy Y S5360:

  • We are not responsible for any damages that may happened due to using this ROM. If any problem happens that related to installing, we will help you to solve it.
  • Use this guide at your own risk. We shall not have any liability or responsibility for whatever happens to you and your device by using the instructions in this guide.
  • The instructions provided in this tutorial for educational purpose only. There is no guarantee that these steps will work for your device.
  • The steps given in this tutorial is only to use with Samsung Galaxy Y and the model number S5360. Applying this guide to any other device or any other model may produce many problems.
  • Read and Understand the whole tutorial first, before going to perform the steps.

Pre Requirements:

  • We recommend you to take a backup of the data in your phone. After installing the ROM, all the files and data will be deleted. Then you can restore it from the backup file.
  • SMS – How to Backup Messages
  • Contacts – Sync with Gmail App
  • Videos, Images, Songs and Other Files – Copy to internal / External SD card or System
  • APN Settings – Take Manual Note from “Settings > Wireless & Networks > Mobile Networks > Access Point Names
  • Then maintain minimum 60% charge in your phone’s battery. This will help you to don’t get switched of your phone.
  • And disable any antivirus and firewalls too.

How to Install Android 4.1 Jelly Bean Jelly Blast ROM on Samsung Galaxy Y S5360:

  • First your mobile must be rooted. Check this – How to root Samsung Galaxy Y
  • Then install ClockWorkMod custom Recovery. Check this – How to install ClockWorkMod Recovery on Samsung Galaxy Y
  • Download the Jelly blast rom for your phone – JellyBlastGenED.signed.zip – (122.47 MB) – Here
  • Then connect your phone to PC or Laptop with USB cable.
  • And transfer the downloaded file to your Phone’s SD card.
  • After that, disconnect the cable from Computer.
  • Then Switch off your phone and reboot in recovery mode.
  • To do that, press Volume Up + Home + Power button together.
  • Then you will move on to recovery page.
  • You can use Volume Up and Volume Down keys to navigate the option.
  • Do all wipe process. Wipe format, wipe system, wipe data, wipe boot, wipe dalivik, wipe cache. And confirm the process on next screen that came after you select.
  • After that select “Install zip from SD card” and in next page “Choose zip from SD card”.
  • Now you have to select the downloaded zip file.
  • And confirm it on the next page.
  • Wait for the process finish. This will install the Jelly Bean on your phone.
  • After few minutes your phone will display a message completed in recovery mode.
  • After the installation complete, Go back to main menu and select Reboot System Now option to restart your phone.
  • If your phone has stuck on the welcome screen or boot screen, just remove the battery and re insert it and do the above steps again.
  • Note: First time boot will take some long time. It will install the ROM updates on first time restarting phone. It takes some minutes to show the home screen on first time.
Do share in comment section in case if you face any errors or met any problems in firmware update process. In future, we will update installing Custom ROM’s on your Samsung Galaxy Y S5360. So, stay updated. Now you have successfully learned how to install Jelly Blast Android 4.1 Jelly Bean custom ROM on Samsung Galaxy Y.
Read More

Saturday

You are choosing to use this tool own yor own . So you accept any risk involved and i am not responsible if any thig Happen due to it . I will help as much as i can .

Intro
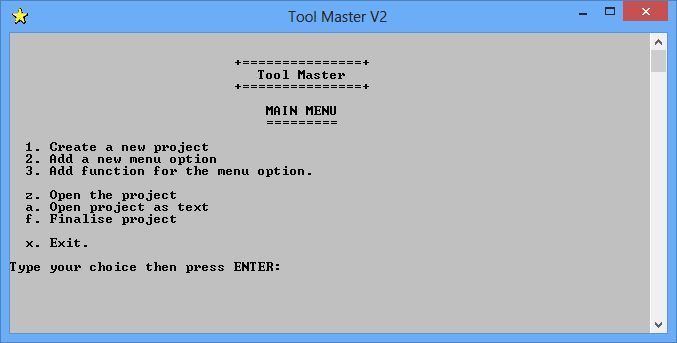
Do you create or want to create simple one click batch tools? Then here is a tool to help you with the process.
It helps you make a new tool with an easy to use interface.

Pre-Requisites
1. A windows machine 
2. Notepad ++ app. Get it from here
3. Some basic knowledge in batch programming.
Its good if you have made at least one tool before. for more info on one click tool refer here
4. wont hurt to have some common sense too

Steps
1. Download the Tool Master tool from next post
2. Extract it in your pc

3. Run the Tool Master exe file
4. Follow the steps in the file
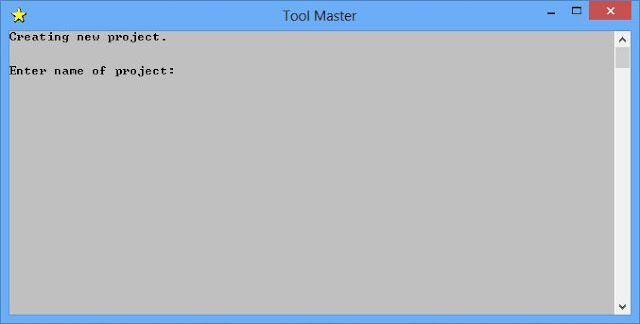
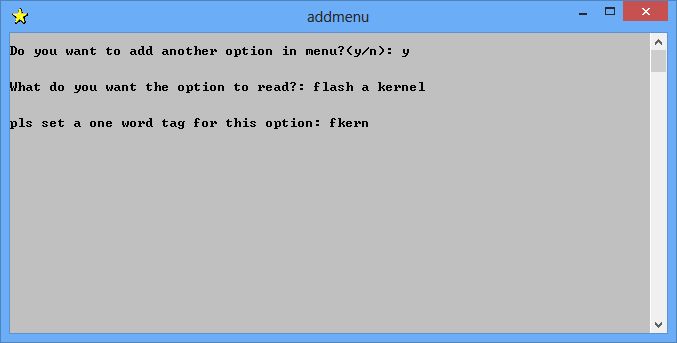
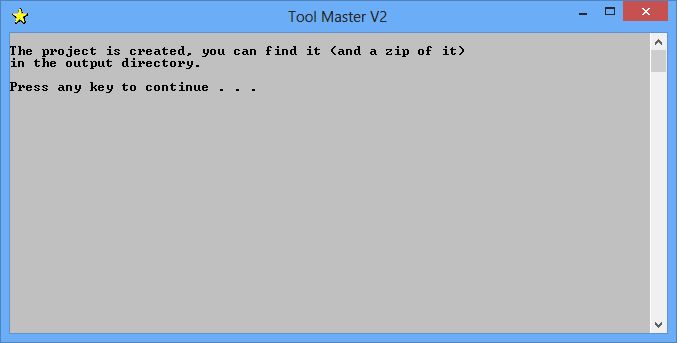
Screenies


Read More

Recent Comments

click here